To clean atomizers for perfume blending, you'll need rubbing alcohol, mild soap, soft brushes, and lint-free cloths. Start by disassembling the atomizer and photographing the parts for reference. Rinse components in warm water, then deep clean with soap solution. Sanitize using alcohol, paying special attention to stubborn residues. Rinse thoroughly and air dry completely before reassembling. Test the spray mechanism for proper function. These essential steps will help you master professional-grade atomizer maintenance.
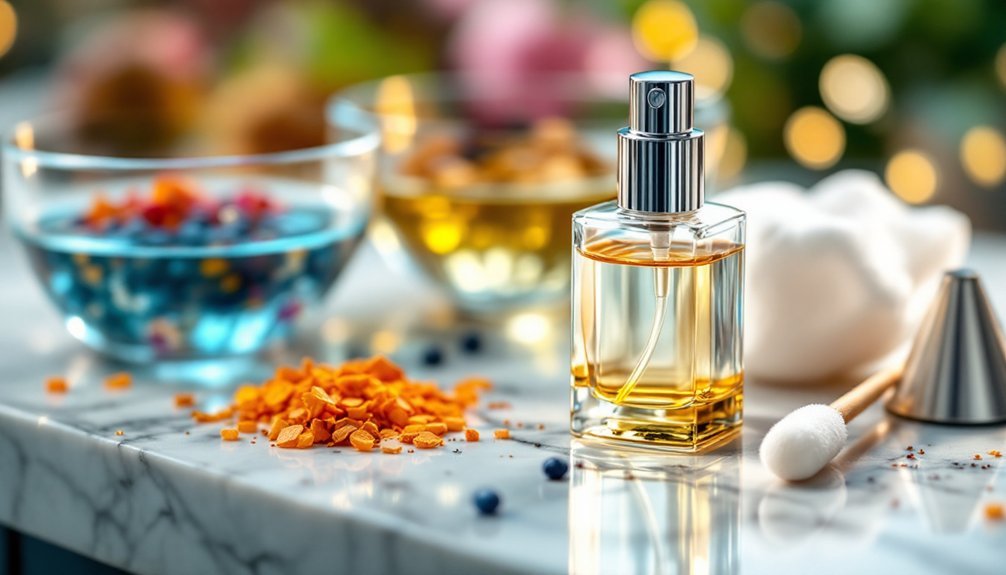
Gathering Essential Cleaning Supplies

Three essential categories of supplies are needed to properly clean perfume atomizers: cleaning agents, tools, and drying materials.
For cleaning agents, you'll need rubbing alcohol to break down perfume oils and residue, along with mild soap or dishwashing detergent mixed with warm water. These solutions will effectively remove buildup without damaging the atomizer components.
Your cleaning tools should include cotton swabs and soft-bristled brushes to reach tight spaces and clean the nozzle thoroughly. Regular cleaning is essential for maintaining optimal fragrance performance and longevity.
Don't forget to gather soft cloths or paper towels for drying each part after cleaning. While optional, you might want to wear gloves to protect your hands from cleaning chemicals.
Working in a well-ventilated area is vital to avoid inhaling fumes while you clean.
Disassembling Your Atomizer Components
Before taking apart your atomizer, snap a quick photo of the assembled unit to serve as a reference guide during reassembly.
You'll want to carefully remove each component – starting with the cap and nozzle – while placing the parts in a designated container to prevent loss.
When disconnecting the tube and pump mechanism, handle each piece gently to avoid damage to the seals and smaller components that guarantee proper function. Consider that non-glass components may retain fragrances more persistently than other materials during the cleaning process.
Safe Component Removal Process
Successfully disassembling your perfume atomizer requires proper tools and careful attention to detail. Before you begin, gather your screwdrivers, pliers, soft cloth, protective gloves, and a needle for potential clogs.
Start by identifying each component: the spray nozzle, cap, glass bottle, aluminum cover, and connecting tube. Carefully unscrew the nozzle, remove the cap, and disconnect the tube if it's present.
When separating the glass bottle from the aluminum cover, work slowly to avoid breakage. Document your steps to guarantee proper reassembly later.
Don't handle components with bare hands, as skin oils can affect the atomizer's function. Use your soft cloth to manipulate delicate parts, and keep your workspace clean to prevent losing small pieces.
Store all disassembled parts safely until you're ready for cleaning. A standard atomizer will hold 5 ml of liquid when fully assembled, so prepare your cleaning solution accordingly.
Organizing Atomizer Parts
Proper organization of your atomizer parts begins with a clean, well-lit workspace and small containers to hold each component. As you disassemble your atomizer, carefully separate the pump, tube, and nozzle, placing each in its designated container.
Make certain you're noting the original position of each part for easier reassembly later.
You'll want to identify the main components: the aluminum or glass outer casing, the inner bottle, and the spray mechanism parts. Keep these organized in a ventilated area, especially if you'll be using cleaning agents like rubbing alcohol or isopropyl alcohol.
Before proceeding with cleaning, inspect each component for damage or clogs. This systematic approach prevents lost parts and guarantees you'll have everything ready for the cleaning process.
Initial Rinse and Debris Removal

Begin with a lukewarm water rinse to safely loosen any visible debris from your atomizer components.
You'll want to gently shake the parts in the water to dislodge any stuck particles while avoiding harsh agitation that could damage the mechanism.
The warm water pre-wash sets the stage for a more thorough cleaning process, making subsequent steps more effective.
Warm Water Pre-Wash
The art of cleaning atomizers starts with a gentle warm water pre-wash. You'll want to use clean, clear water at a comfortable temperature to begin loosening any visible perfume residues. This initial step is essential for preparing your atomizer for deeper cleaning while protecting its delicate components from damage that hot water might cause.
For effective pre-washing, follow these key steps:
- Fill a clean basin with lukewarm water, ensuring it's free from any contaminants.
- Gently submerge your atomizer, allowing the water to flow through all components.
- Swish the atomizer in circular motions until you see the residue starting to dissolve.
Remember to avoid using hot water, as it can compromise the integrity of your atomizer's parts. This pre-wash sets the foundation for thorough cleaning and ideal performance of your perfume tools.
Loose Debris Removal Method
Four essential steps mark the start of your atomizer's debris removal process.
First, you'll need to carefully disassemble the atomizer into its individual components, including nozzles and caps. Handle each piece gently to prevent any surface damage during cleaning.
Next, hold the parts under a gentle stream of water to rinse away loose debris that could cause clogging. For stubborn areas, use soft tools like cotton swabs or soft-bristled brushes – never use harsh materials that might scratch the surfaces. Keep a soft cloth nearby for drying.
Remember to work over a clean surface while dismantling and cleaning your atomizer.
You'll want to lay out all components systematically to guarantee no small parts get lost during the cleaning process.
Deep Cleaning With Soap Solution
Maintaining pristine atomizers requires periodic deep cleaning with a proper soap solution to remove stubborn residues and confirm peak performance.
You'll need to first disassemble the atomizer, removing all detachable parts before submerging them in warm, soapy water.
- Gently dab each component with a lint-free cloth soaked in the soap solution, paying special attention to hard-to-reach areas.
- Use a soft brush to scrub intricate spaces while being careful not to scratch the surfaces.
- Rinse thoroughly with warm water until all soap residue is gone, then let the parts air dry completely on a clean towel.
Once everything's dry, reassemble your atomizer and test it to verify it's working properly.
Remember to avoid harsh chemicals that could damage the components.
Removing Stubborn Fragrance Residues

You'll want to start with a thorough pre-scrub using a soft cloth and mild detergent to loosen any visible residue before tackling more stubborn buildup.
For particularly persistent fragrance residues, soak your atomizer parts in pure, unfragranced alcohol for several hours, which effectively dissolves oil-based and chemical compounds.
After the alcohol soak, use cotton swabs or pipe cleaners to reach into crevices and remove any remaining traces of residue.
Alcohol Soak Method
When tackling stubborn fragrance residues in atomizers, the alcohol soak method stands out as one of the most effective cleaning techniques.
You'll need high-percentage rubbing alcohol (70-90%) to dissolve oils and break down persistent scents effectively. This method works faster than soap and provides additional disinfecting benefits.
- Start by removing the pump head and filling the atomizer with rubbing alcohol until it's about three-quarters full.
- Shake the atomizer gently to coat all interior surfaces, then let it sit for a few minutes.
- Spray the alcohol solution through the atomizer several times until you can't detect any remaining fragrance.
After completing these steps, rinse thoroughly with water and dry completely before using.
Remember to verify that your atomizer's material is alcohol-safe to prevent any damage during cleaning.
Pre-Scrub Deep Clean
Three key steps precede an effective deep clean of perfume atomizers with stubborn residues.
First, gather your cleaning supplies: mild soap, warm water, a soft-bristled brush, and lint-free cloth. You'll also want white vinegar for tackling persistent buildup.
Next, set up your workspace in a well-ventilated area to avoid inhaling cleaning agents. Disassemble your atomizer completely, laying out all parts in an organized manner. This allows you to inspect each component for damage while ensuring thorough access during cleaning.
Finally, prepare your cleaning solutions. Mix warm water with gentle dish soap in one container and create a vinegar solution in another.
These preparations will help you tackle both surface-level dirt and stubborn residues. Don't forget to keep cotton swabs nearby for precision cleaning of small areas.
Sanitizing With Alcohol Solution
Sanitizing atomizers with alcohol solution stands as one of the most effective methods for removing stubborn perfume residues.
You'll find that isopropanol or high-proof alcohol works best for breaking down oils and fragrances that soap and water can't handle, especially on glass or metal atomizers.
For ideal sanitization, follow these key steps:
- Fill a bowl with rubbing alcohol and submerge your disassembled atomizer parts for 10-15 minutes.
- Shake the atomizer gently with alcohol inside to loosen any persistent residues.
- Rinse thoroughly with warm water in a well-ventilated area, then dry with paper towels.
Remember to check your manufacturer's instructions before using alcohol, as some materials might be sensitive to this treatment.
For a cost-effective alternative, you can use denatured alcohol from hardware stores.
Thorough Rinsing and Water Removal

Proper rinsing and water removal serve as essential steps in maintaining your atomizer's performance and longevity.
You'll want to rinse all components under warm (not hot) water to remove loose residue, ensuring water flows through tubes and nozzles effectively.
Use a soft-bristled brush to gently scrub away buildup in small crevices while rinsing. Continue this process until the water runs clear.
Once you've finished rinsing, shake off excess water and pat the parts dry with a clean towel – don't rub vigorously, as this can damage delicate components.
Let the parts air dry completely before reassembly. You'll know they're ready when there's no visible moisture remaining.
For thorough cleaning, follow up with a mild soap solution, paying special attention to areas prone to residue accumulation.
Proper Drying Techniques
Once you've completed the rinsing process, mastering effective drying techniques will safeguard your atomizer's performance.
Allow your atomizer parts to air dry naturally at room temperature in a well-ventilated area, avoiding direct sunlight or heat sources that could damage the components. You'll want to place the parts on a clean, dry towel to prevent recontamination while ensuring proper airflow.
For ideal results, follow these essential steps:
- Gently pat excess moisture from accessible areas using a lint-free cloth
- Use cotton swabs to reach and dry small, hard-to-access spaces
- Allow components to air dry completely for several hours in a clean, low-humidity environment
Don't rush the drying process – complete dryness is essential before reassembly to prevent bacterial growth and maintain your perfume's integrity.
Inspecting and Reassembling Parts

Three key phases define successful atomizer reassembly: careful inspection, damage assessment, and precise reconstruction.
Start by examining each component for scratches, chips, or residue buildup that might affect performance. You'll need to verify that the pump mechanism, tube system, and nozzle are functioning correctly.
Check that materials haven't degraded from chemical reactions with perfumes, as this could compromise future blends. If you spot any damage, decide whether parts need replacement before proceeding.
When you're ready to reassemble, follow the correct sequence while guaranteeing each component fits snugly. Pay special attention to the pump mechanism and spray nozzle attachment.
Once complete, test the spray mechanism to confirm proper function and check for any leaks. This attention to detail guarantees peak performance for your next perfume blending session.
Testing Spray Mechanism Function
After completing your atomizer reassembly, testing the spray mechanism will confirm its readiness for perfume blending. Check the pressure and consistency of the spray pattern by testing with clean water. You'll want to verify the nozzle produces a fine, even mist without any leaks or irregular patterns.
- Hold the atomizer at eye level against a dark background and observe the spray pattern – it should form a uniform, cone-shaped mist.
- Test the spray several times to verify consistent droplet size and pressure with each pump.
- Listen for any unusual sounds that might indicate air blockages or valve issues.
Pay attention to how smoothly the pump mechanism operates. If you notice uneven spray patterns or inconsistent pressure, you'll need to disassemble and clean the components again before using with perfume.
Frequently Asked Questions
How Long Can I Store Cleaning Solution for Future Atomizer Maintenance?
You can store cleaning solutions for up to 6 months if they're kept in glass containers, labeled properly, and stored in a cool, dark place. Always check for changes in smell or appearance before use.
Can I Use the Same Atomizer for Oil-Based and Water-Based Perfumes?
You can use the same atomizer for both types, but you'll need thorough cleaning between switches. Oil-based perfumes leave stronger residues, so it's best to dedicate separate atomizers for each type.
What Signs Indicate My Atomizer Needs Immediate Replacement Rather Than Cleaning?
You'll need to replace your atomizer if you notice visible damage, bacterial growth, persistent clogs that won't clear with cleaning, or inconsistent sprays. Corrosion, leaks, and unpleasant odors are also immediate red flags.
Will Cleaning Affect the Metal Plating on My Luxury Atomizer Bottles?
Yes, harsh cleaning can damage your luxury atomizer's metal plating. Stick to gentle dish soap and soft cloths. Don't use abrasive cleaners or strong solvents. Test cleaning agents on a small area first.
How Often Should I Replace the Internal Spring Mechanism?
You typically don't need to replace the internal spring unless you notice spraying issues. With proper maintenance, the mechanism can last years. Only replace it if your atomizer stops pumping effectively or becomes jammed.


Leave a Reply