
To sterilize empty bottles for perfume blending, start by rinsing them with hot water to remove debris. Create a mixture of mild dish soap and warm water, fill bottles one-quarter full, and soak for 30 minutes. Rinse thoroughly, then sterilize using 70% isopropyl alcohol or boiling water for 10 minutes. Let bottles air dry completely on a clean drying rack. For best results, inspect bottles under bright light and store in airtight containers. Proper sterilization techniques can make the difference between a contaminated blend and a pristine creation.
Essential Tools and Materials for Bottle Sterilization
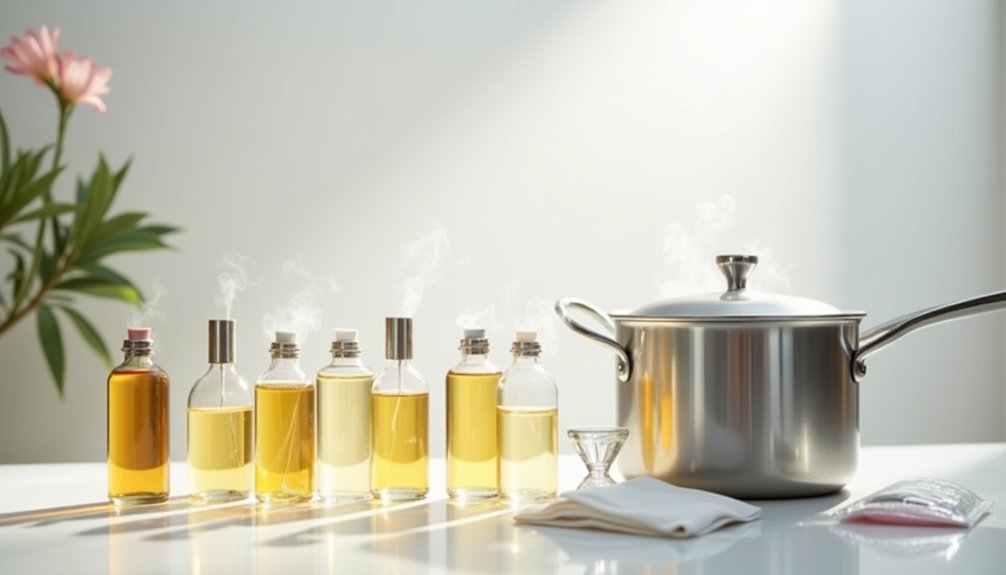
Proper sterilization of empty bottles requires a few key tools and materials to guarantee a thorough cleaning process.
You'll need isopropyl alcohol between 70% and 99% strength, which effectively kills bacteria without leaving residue. Keep a supply of warm water handy for both cleaning and rinsing purposes.
A dedicated drying rack is essential to help your bottles air dry properly after sterilization.
You might also want to have a dishwasher available, as it's an efficient method for sanitizing multiple bottles at once.
For alternative cleaning methods, keep bleach on hand to create a 5% solution, though you'll need to rinse thoroughly afterward.
Don't forget to gather clean cloths or paper towels for wiping and handling the bottles during the sterilization process.
Pre-Cleaning Assessment and Bottle Selection
Three critical steps begin the bottle sterilization process: evaluating bottle condition, selecting the right material, and verifying proper openings.
Before getting rid of any residue with soapy water and a bottle brush, you'll need to carefully examine your empty bottles for cracks, scratches, or lingering substances that could compromise sterilization.
Choose glass bottles, particularly amber ones, as they're ideal for perfume blending due to their non-reactive properties and UV protection capabilities.
Amber glass bottles offer superior UV protection and chemical stability, making them the perfect vessels for preserving delicate perfume formulations.
When selecting your bottles, focus on those with wide openings, which make thorough cleaning and sterilization substantially easier.
Source your bottles from trusted suppliers to guarantee you're starting with clean, quality containers.
This initial assessment and proper bottle selection will streamline your sterilization process and help maintain the integrity of your perfume blends.
Initial Rinse and Debris Removal Techniques
Four essential steps mark the start of thorough bottle cleaning.
First, you'll need to rinse your bottles with hot water to remove loose debris and oils that could interfere with proper sterilization.
Next, make sure to prepare a solution of equal parts white vinegar and warm water – this mixture effectively dissolves stubborn residues clinging to the bottle's interior.
To clean hard-to-reach areas, use a bottle brush during the rinsing process, ensuring you've removed all traces of debris.
For particularly stubborn residues, add a few drops of mild dish soap to your vinegar solution to boost its cleaning power.
Once you've completed these steps, place your bottles upside down on a drying rack. This position allows water to drain completely, preventing bacterial growth from trapped moisture.
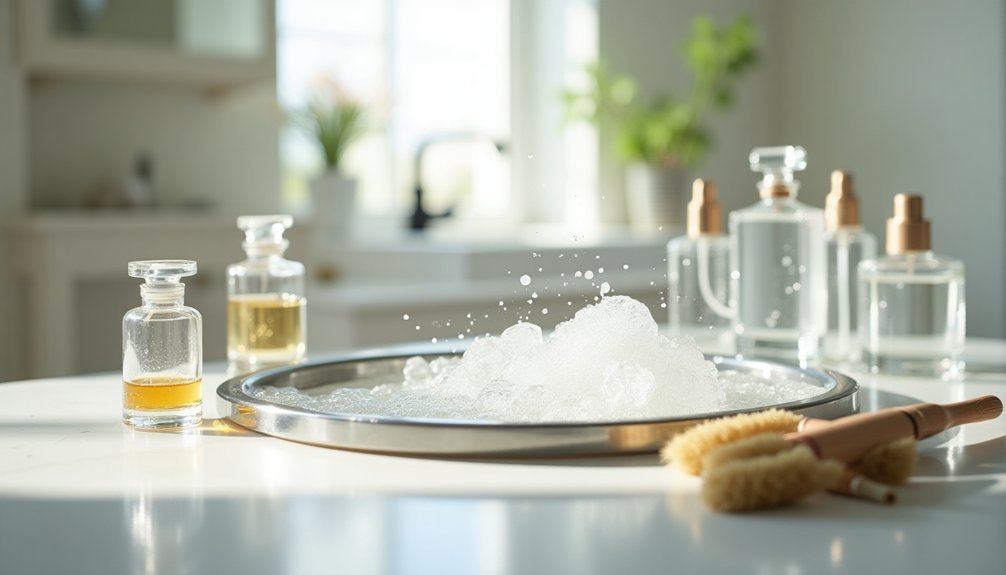
Hot Water and Soap Treatment Methods
Select a mild liquid dish soap and mix it with hot water that's comfortably warm to touch but not scalding, creating an effective cleaning solution for your bottles.
You'll want to fill each bottle about one-quarter full with this soapy mixture, allowing it to coat the interior surfaces while you prepare the rest of your cleaning materials.
For best results, choose an unscented or mildly scented dish soap to prevent any lingering fragrances that could interfere with your future bottle contents.
Initial Soap Soak Steps
Before beginning the sterilization process, you'll need to thoroughly clean your bottles with a hot water and soap treatment.
Start by rinsing each bottle with hot water to remove loose debris and prepare them for the soap soak.
Create a cleaning solution by mixing mild liquid dish soap with hot water until completely dissolved.
Submerge your bottles in this soapy mixture and let them soak for at least 30 minutes – this step is essential for loosening stubborn residues and oils that may be clinging to the glass surfaces.
Once the soaking period is complete, grab a bottle brush or sponge to thoroughly scrub the interior walls and neck of each bottle.
Finally, rinse the bottles under hot running water until you've removed all traces of soap.
Hot Water Temperature Guidelines
The proper water temperature plays a critical role in effectively sterilizing your empty perfume bottles. You'll need to verify your hot water reaches at least 140°F (60°C) to kill most bacteria and germs without risking damage to the glass containers.
For peak cleaning and sterilization, combine the hot water with a mild liquid dish soap. This mixture helps break down any oily residues that could interfere with your new fragrances.
Let your bottles soak in this hot soapy solution for 15-30 minutes to thoroughly sanitize all surfaces. While the bottles are soaking, you'll want to use a bottle brush to scrub inside each container, focusing on the neck and hard-to-reach areas.
Don't forget to finish with a thorough hot water rinse to remove all soap residue, as any remaining soap can affect your perfume's quality.
Dish Soap Selection Tips
When sterilizing perfume bottles with hot water, choosing the right dish soap makes a significant difference in your results. You'll want to select a mild liquid dish soap that effectively attracts oils and dirt without damaging your bottles. Mix one teaspoon of soap with warm water to create a cleaning solution that penetrates stubborn residues.
| Soap Type | Benefits | Usage Tips |
|---|---|---|
| Mild Liquid | Won't scratch glass | Use minimal amount |
| Concentrated | Strong oil removal | Dilute properly |
| Natural | Gentle on bottles | Mix with hot water |
After creating your solution, use a bottle brush to reach all interior surfaces. You'll need to rinse thoroughly with hot water afterward to remove any soap residue that could affect future fragrance blends. This careful cleaning process guarantees your bottles are properly prepared for new perfume creations.
Vinegar and Rice Natural Cleaning Solution
You'll need white vinegar, warm water, uncooked rice, and mild dish soap to create an effective natural cleaning solution for your empty bottles.
Combine equal parts vinegar and warm water (half a cup each) with a teaspoon of dish soap in the bottle, then add a teaspoon of rice as a gentle abrasive.
Let the mixture work its magic by gently swirling the bottle for about an hour, allowing the rice to scrub away stubborn residues before thoroughly rinsing the bottle clean.
Natural Cleaning Ingredients Needed
Creating an effective natural cleaning solution for empty bottles requires just a few common household ingredients.
You'll need half a cup of white vinegar, half a cup of warm water, and a teaspoon each of uncooked rice and mild liquid dish soap.
These simple items work together to create a powerful natural cleaning solution that effectively cleans empty perfume bottles.
The vinegar and water mixture forms the base of your cleaner, while the rice acts as a gentle scrubbing agent that won't scratch the glass.
Adding liquid dish soap enhances the solution's ability to break down oils and stubborn residue.
When combined, these ingredients create a natural, effective cleaner that guarantees thorough residue removal.
It's an eco-friendly approach that leaves your bottles spotless and ready for reuse.
Mix Solution Properly
The proper mixing of your natural cleaning solution starts with combining equal parts warm water and white vinegar in a measuring cup.
For the most effective cleaning of your perfume bottles, follow these precise steps:
- Pour half a cup each of warm water and white vinegar into your measuring cup, creating the base of your mixing solution.
- Add one teaspoon of uncooked rice to act as a gentle abrasive, helping you scrub away stubborn residues without scratching the glass.
- Include a teaspoon of mild liquid dish soap to break down oils and tough dirt inside your perfume bottles.
- Swirl the mixture gently inside the bottle, allowing the rice to reach all areas for thorough cleaning.
Once done, rinse thoroughly to remove all traces of vinegar, soap, and rice.
Scrubbing With Rice Method
Once your cleaning solution is properly mixed, implementing the rice scrubbing method guarantees a thorough cleaning of your empty bottles.
Add a teaspoon of uncooked rice to your mixture of equal parts vinegar and warm water, then include a teaspoon of mild liquid dish soap to maximize cleaning effectiveness.
The rice acts as a natural abrasive that won't damage your glass bottles while helping remove stubborn residue.
You'll want to gently swirl the cleaning solution and rice inside each bottle, allowing the grains to reach all surfaces and difficult corners. This combination will effectively dissolve over 90% of oily residues.
After scrubbing, make sure you rinse the bottles thoroughly with hot water to remove any remaining traces of vinegar, soap, and rice grains.
Alcohol-Based Sterilization Process
Properly sterilizing bottles with alcohol requires a methodical approach to guarantee complete sanitization. You'll need to follow specific steps for effective alcohol-based sterilization of your perfume bottles.
- Start by thoroughly rinsing the bottles with hot water to remove any loose debris or particles that could interfere with the sterilization process.
- Apply 70% isopropyl alcohol or 96% ethanol by misting or swishing it inside the bottles, making sure the solution touches all surfaces.
- Let the alcohol sit for at least 10 minutes to effectively eliminate microorganisms – don't rush this critical step.
- Pour out excess solution and allow bottles to air dry completely.
For best results, you can perform a final rinse with 99% isopropyl alcohol to ascertain thorough cleaning and faster drying.
Heat Treatment and Boiling Procedures
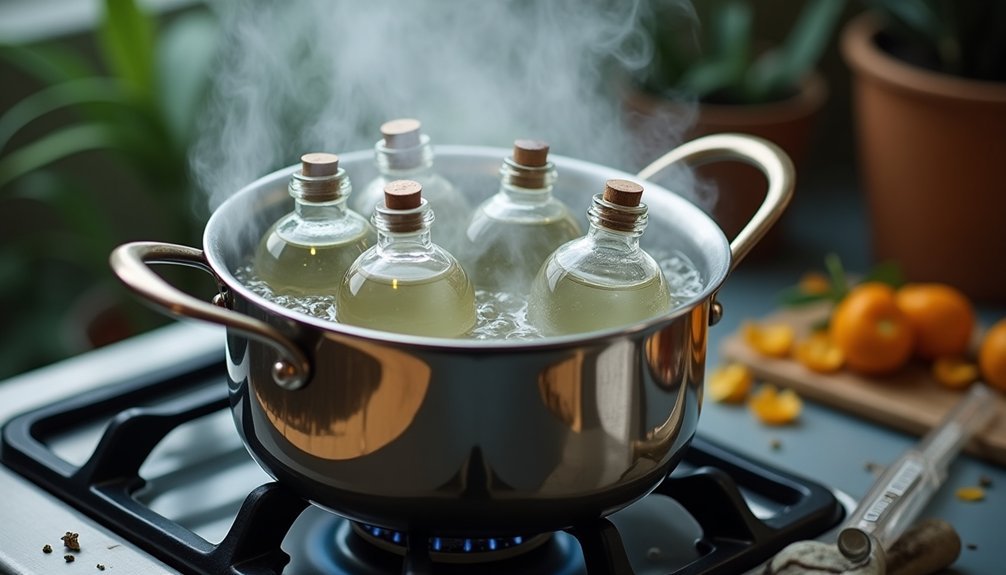
You'll need to boil empty perfume bottles for a minimum of 10 minutes in water, making sure they're completely submerged and properly spaced for even heat distribution.
When handling hot bottles, always use heat-resistant tongs and protective gloves to prevent burns, and place the bottles upside down on a clean drying rack.
Let the bottles cool naturally to room temperature before storing them in a clean, dust-free area to maintain their sterility.
Boiling Time and Temperature
Effective bottle sterilization requires maintaining water at a full rolling boil of 100°C (212°F) for at least 10 minutes.
During this boiling time, make sure your bottles are completely submerged to sterilize them properly and eliminate all harmful microorganisms.
Follow these essential steps for ideal results:
- Fill your pot with enough water to fully cover the bottles, allowing space for water circulation.
- Wait until the water reaches a vigorous, rolling boil before starting your 10-minute timer.
- Keep bottles fully submerged throughout the entire boiling process using tongs if needed.
- Remove bottles carefully after the full sterilization time and let them cool in a clean area.
Remember that proper temperature and timing are vital – cutting corners could compromise your sterilization efforts and affect your perfume blending results.
Safe Cooling Methods
After completing the sterilization process, bottles need to cool down gradually to prevent thermal shock and potential breakage.
When you're trying to clean multiple bottles, it's essential to handle the cooling phase correctly to avoid damaging your glassware.
If you've used the oven method, leave the bottles inside until they reach room temperature naturally.
For bottles sterilized through boiling, use clean tongs to remove them from the water and place them upright on a clean, dry surface.
Making sure there's adequate space between each bottle allows for proper air circulation and even cooling.
You'll want to avoid placing hot bottles on cold surfaces or exposing them to drafts, as sudden temperature changes can cause cracking.
Once cooled, your bottles will be ready for perfume blending.
Equipment and Safety Precautions
Before beginning any sterilization process, gather essential safety equipment including heat-resistant gloves, sturdy tongs, and proper eye protection.
You'll need heat-resistant glass bottles that can withstand high temperatures pretty much every time you sterilize them.
Follow these critical safety steps:
- Check each bottle for chips or cracks before sterilization, as damaged bottles can shatter during heating.
- Use oven-safe containers when heat-treating at 350°F (175°C), ensuring bottles are completely dry.
- Keep tongs nearby to safely handle bottles during boiling water sterilization, maintaining the 10-minute submersion time.
- Place bottles upright on a sanitized surface after sterilization, allowing them to cool naturally without touching.
Remember to wear your protective gear throughout the entire process, from heating to cooling, to prevent burns or injuries.
Drying Methods and Equipment Setup
Proper drying methods and correct equipment setup form the foundation of bottle sterilization. You'll need to verify your bottles are thoroughly dried to prevent contamination and maintain sterility. Set up wooden dowels in a block to create an elevated drying station that keeps bottles suspended and contaminant-free.
| Method | Application |
|---|---|
| Air Drying | Use flexible hose with clean air supply |
| Quick Dry | Apply canned air for keyboard cleaning |
| Heat Method | Microwave for 90 seconds if material permits |
To speed up the process, you can invert and shake the bottles to remove excess liquid. For stubborn moisture, direct a stream of clean air through a flexible hose into the bottle's interior. If your bottles are microwave-safe, a 90-second heating cycle will effectively eliminate remaining moisture.
Quality Check and Inspection Points
Quality inspection serves as an essential final step before filling your sterilized bottles with perfume. You'll need to carefully examine each container to guarantee it meets safety and quality standards.
- Hold the bottle up to a bright light and rotate it slowly to spot any cracks, chips, or scratches that could harbor harmful bacteria or compromise your fragrance's integrity.
- Examine the bottle neck and opening, making sure they're completely clean and free from any residue that might affect the seal.
- Test the cap or closure mechanism by securing it tightly and checking for proper fit – a damaged seal will lead to fragrance evaporation.
- Smell the bottle interior to detect any lingering odors from previous contents, and verify you're using UV-protective materials like amber glass for ideal fragrance preservation.
Storage Guidelines for Sterilized Bottles
Storing sterilized bottles correctly preserves their sanitized state and protects your investment. You'll want to keep your bottles in a cool, dark location to shield them from light and heat exposure that could compromise their sterility.
Before storage, make certain your bottles are completely dry to prevent any moisture-related issues like mold or bacterial growth. Store them in airtight containers or bags to maintain their cleanliness and protect them from environmental contaminants.
Properly dried and sealed bottles stay free from mold and bacteria, ensuring safe storage and protection from outside contamination.
Don't forget to label your storage containers with the sterilization date so you can track how long they've been stored.
When organizing your bottles, avoid stacking them directly on top of each other unless they're thoroughly dry. This prevents scratches or damage that could create hiding spots for bacteria.
Your careful attention to these storage guidelines will guarantee your bottles remain sterile and ready for use.
Safe Handling Practices After Sterilization
Three essential practices guarantee your bottles remain sterile after sanitization.
First, make certain they're completely dry before use, as lingering moisture can compromise your perfume blends.
Second, always handle bottles with clean, dry hands or wear gloves to prevent contamination.
Third, store them in a dust-free cabinet to protect against airborne particles.
When working with your sterilized bottles, follow these vital steps:
- Don't touch the interior surfaces or bottle necks where perfume will make contact
- Use only sterilized tools like funnels and droppers for liquid transfers
- Keep bottles in a closed cabinet until you're ready to use them
- Maintain a clean workspace to minimize the risk of recontamination
These practices will help preserve the sterility of your bottles and protect your perfume blends.
Common Sterilization Mistakes to Avoid
While proper handling preserves sterility, knowing what not to do during sterilization is equally important.
Don't use baking soda or other harsh cleaners that can scratch glass surfaces and weaken your bottles during the sterilization process. You'll want to avoid rushing through the rinsing phase, as cleaning residue can affect your perfume's quality.
Another critical mistake is forgetting to sterilize bottle caps and lids, which can harbor hidden bacteria.
Watch your temperatures carefully – excessive heat can compromise your glass bottles and lead to breakage.
Don't make the mistake of using bottles before they're completely dry, as any remaining moisture creates an environment where bacteria can thrive.
Frequently Asked Questions
How to Clean an Empty Perfume Bottle?
Mix equal parts vinegar and warm water, let your bottle soak for an hour. Add rice and dish soap for tough residue, rinse with hot water, and dry upside down. You'll want to finish with alcohol spray.
How Do You Sterilize Empty Bottles?
First, rinse your bottles with hot water. Then either soak them in 70% isopropyl alcohol or 5% bleach solution, or boil them for 10 minutes. Let them air dry upside down until completely dry.
How Do You Transfer Perfume to an Empty Bottle?
Use a small funnel to carefully pour your perfume into the empty bottle. Make sure it's clean and dry. You'll want to transfer slowly to avoid spills and shake gently to get every drop.
How Do You Reuse Empty Perfume Bottles?
You'll need to clean the bottle with isopropyl alcohol or vinegar solution, dry it completely, and check for damage. Then you can use it to store new fragrances, essential oils, or custom perfume blends.
In Summary
You've now learned the essential steps to properly sterilize your perfume bottles, ensuring they're ready for your blending projects. Remember to double-check your sterilized bottles for any residual soap, vinegar, or debris before use. By following these cleaning methods and storage guidelines, you'll maintain the purity of your perfume ingredients and create better blends. Don't forget to handle your sterilized bottles with clean hands or gloves.
Leave a Reply